Building a Briefcase that Deploys Code

Over the course of the past few weeks, I’ve been building a briefcase that deploys code.
This was inspired by the “Nuclear football,” the briefcase that follows the President of the United States around used to authorize a nuclear attack. Macabre, I know.
A briefcase that deploys code is silly. For most healthy software teams, deploying new code is a daily routine and usually happens without much fanfare. But don’t you miss the days when deploying was a nail-biting affair? (I don’t.)
Enter the Deploy Football: a briefcase that deploys code with all of the excitement of a schlocky 80’s action movie. Enter the codes, unlock the latches, turn the keys, and the press the big red button. A second later, your deploy will begin.
Ladies and gentlemen, we have a working prototype. pic.twitter.com/VTWeCJqeBl
— Kelly Sutton (@KellySutton) June 3, 2017
This post covers how I built one, how we use it to sometimes deploy applications at Gusto, and how you might build one too.
Ingredients
The critical component in the Deploy Football is a modified AWS IoT Button. If you are familiar with the normal Amazon Dash Button, it’s that but rather than order more garbage bags
it can issue an arbitrary HTTP request.
I’ll discuss later exactly how it was modified to issue arbitrary requests, but first let’s spell out what’s required:
- An AWS IoT Button
- 2 Key Switches
- Speaker Wire
, although any high gauge wire should do
- A Big Red Button
, the sillier the better
- An old briefcase
- Some wood or cardboard for mounting the components
- Electrical tape
Dollar-wise, I spent $60 on all of the pieces. My father had an old briefcase laying around, so that helped the costs as well.
Proof of Concept
The AWS IoT Button is a nifty device. It connects to a WiFi network and issues an HTTP request, which is usually handled by an AWS Lambda function on the receiving end. Because AWS Lambda can run arbitrary bits of code, the world is your oyster once the request makes it to Lambda.

To make sure this whole concept would work, I first had to de-risk the operation by answering a simple question: “Can the AWS IoT Button be hacked to be triggered by something other than a button press?”
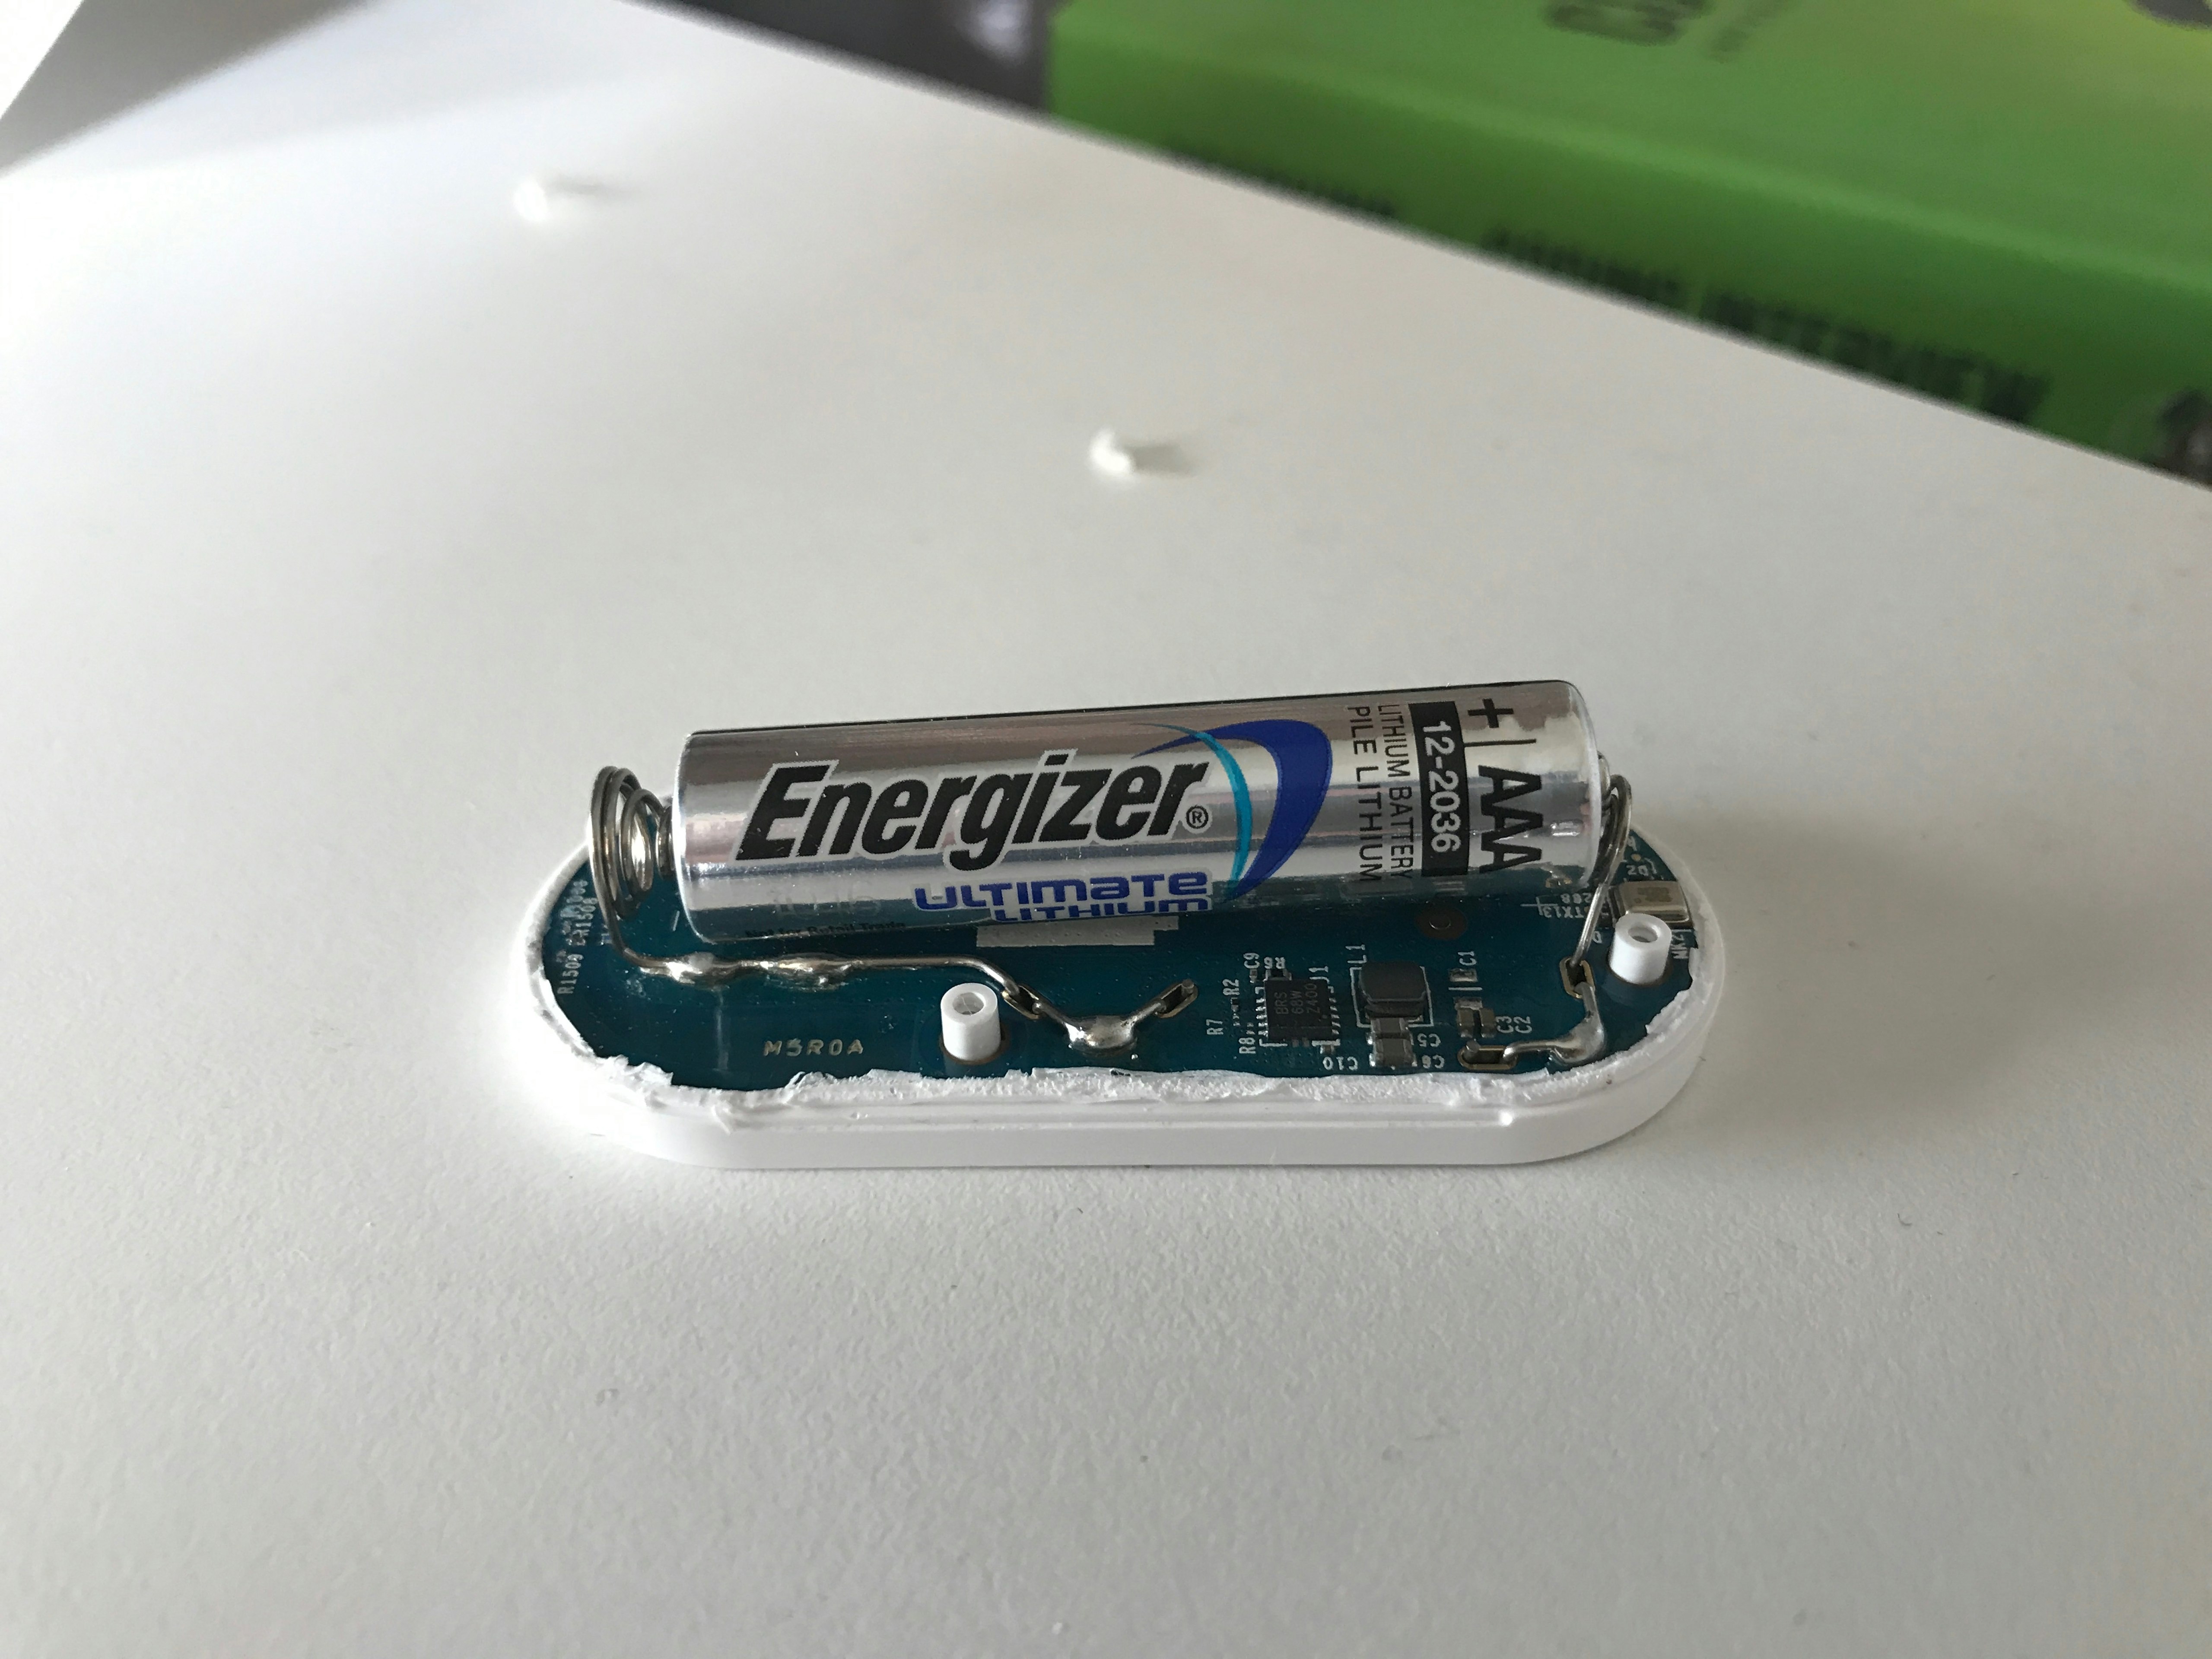
After using a small, slotted screwdriver to crack open the plastic casing, you’ll notice a sophisticated printed circuit board with a low-tech AAA battery.

Once the thing was opened, the next part was to figure out how to simulate a button press. On the “front” side of the PCB there’s a physical switch that actuates to complete the circuit and wake the button up.
But rather than actuating a switch, I wanted to see if there were any other ways of completing the circuit. After prodding with a few wires, it turns out there are two terminals labeled “TMF27” and “TMF32” that would simulate a button press by connecting a wire between the two.

But these things are tiny, measuring no more than a millimeter or two on each side. After consulting with a professional (my dad), we decided that soldering directly onto the switch itself (labeled “S1”) would be the best approach.
After the soldering was complete, we had proven the concept that would drive the rest of the product: we could simulate a button press by completing a circuit. Now to construct the rest of this thing.
Construction
After the wires had been soldered to the button, assembling the rest was pretty easy. Please note that I have no electrical engineering or hardware training. I apologize in advance if the following images are cringe-worthy.

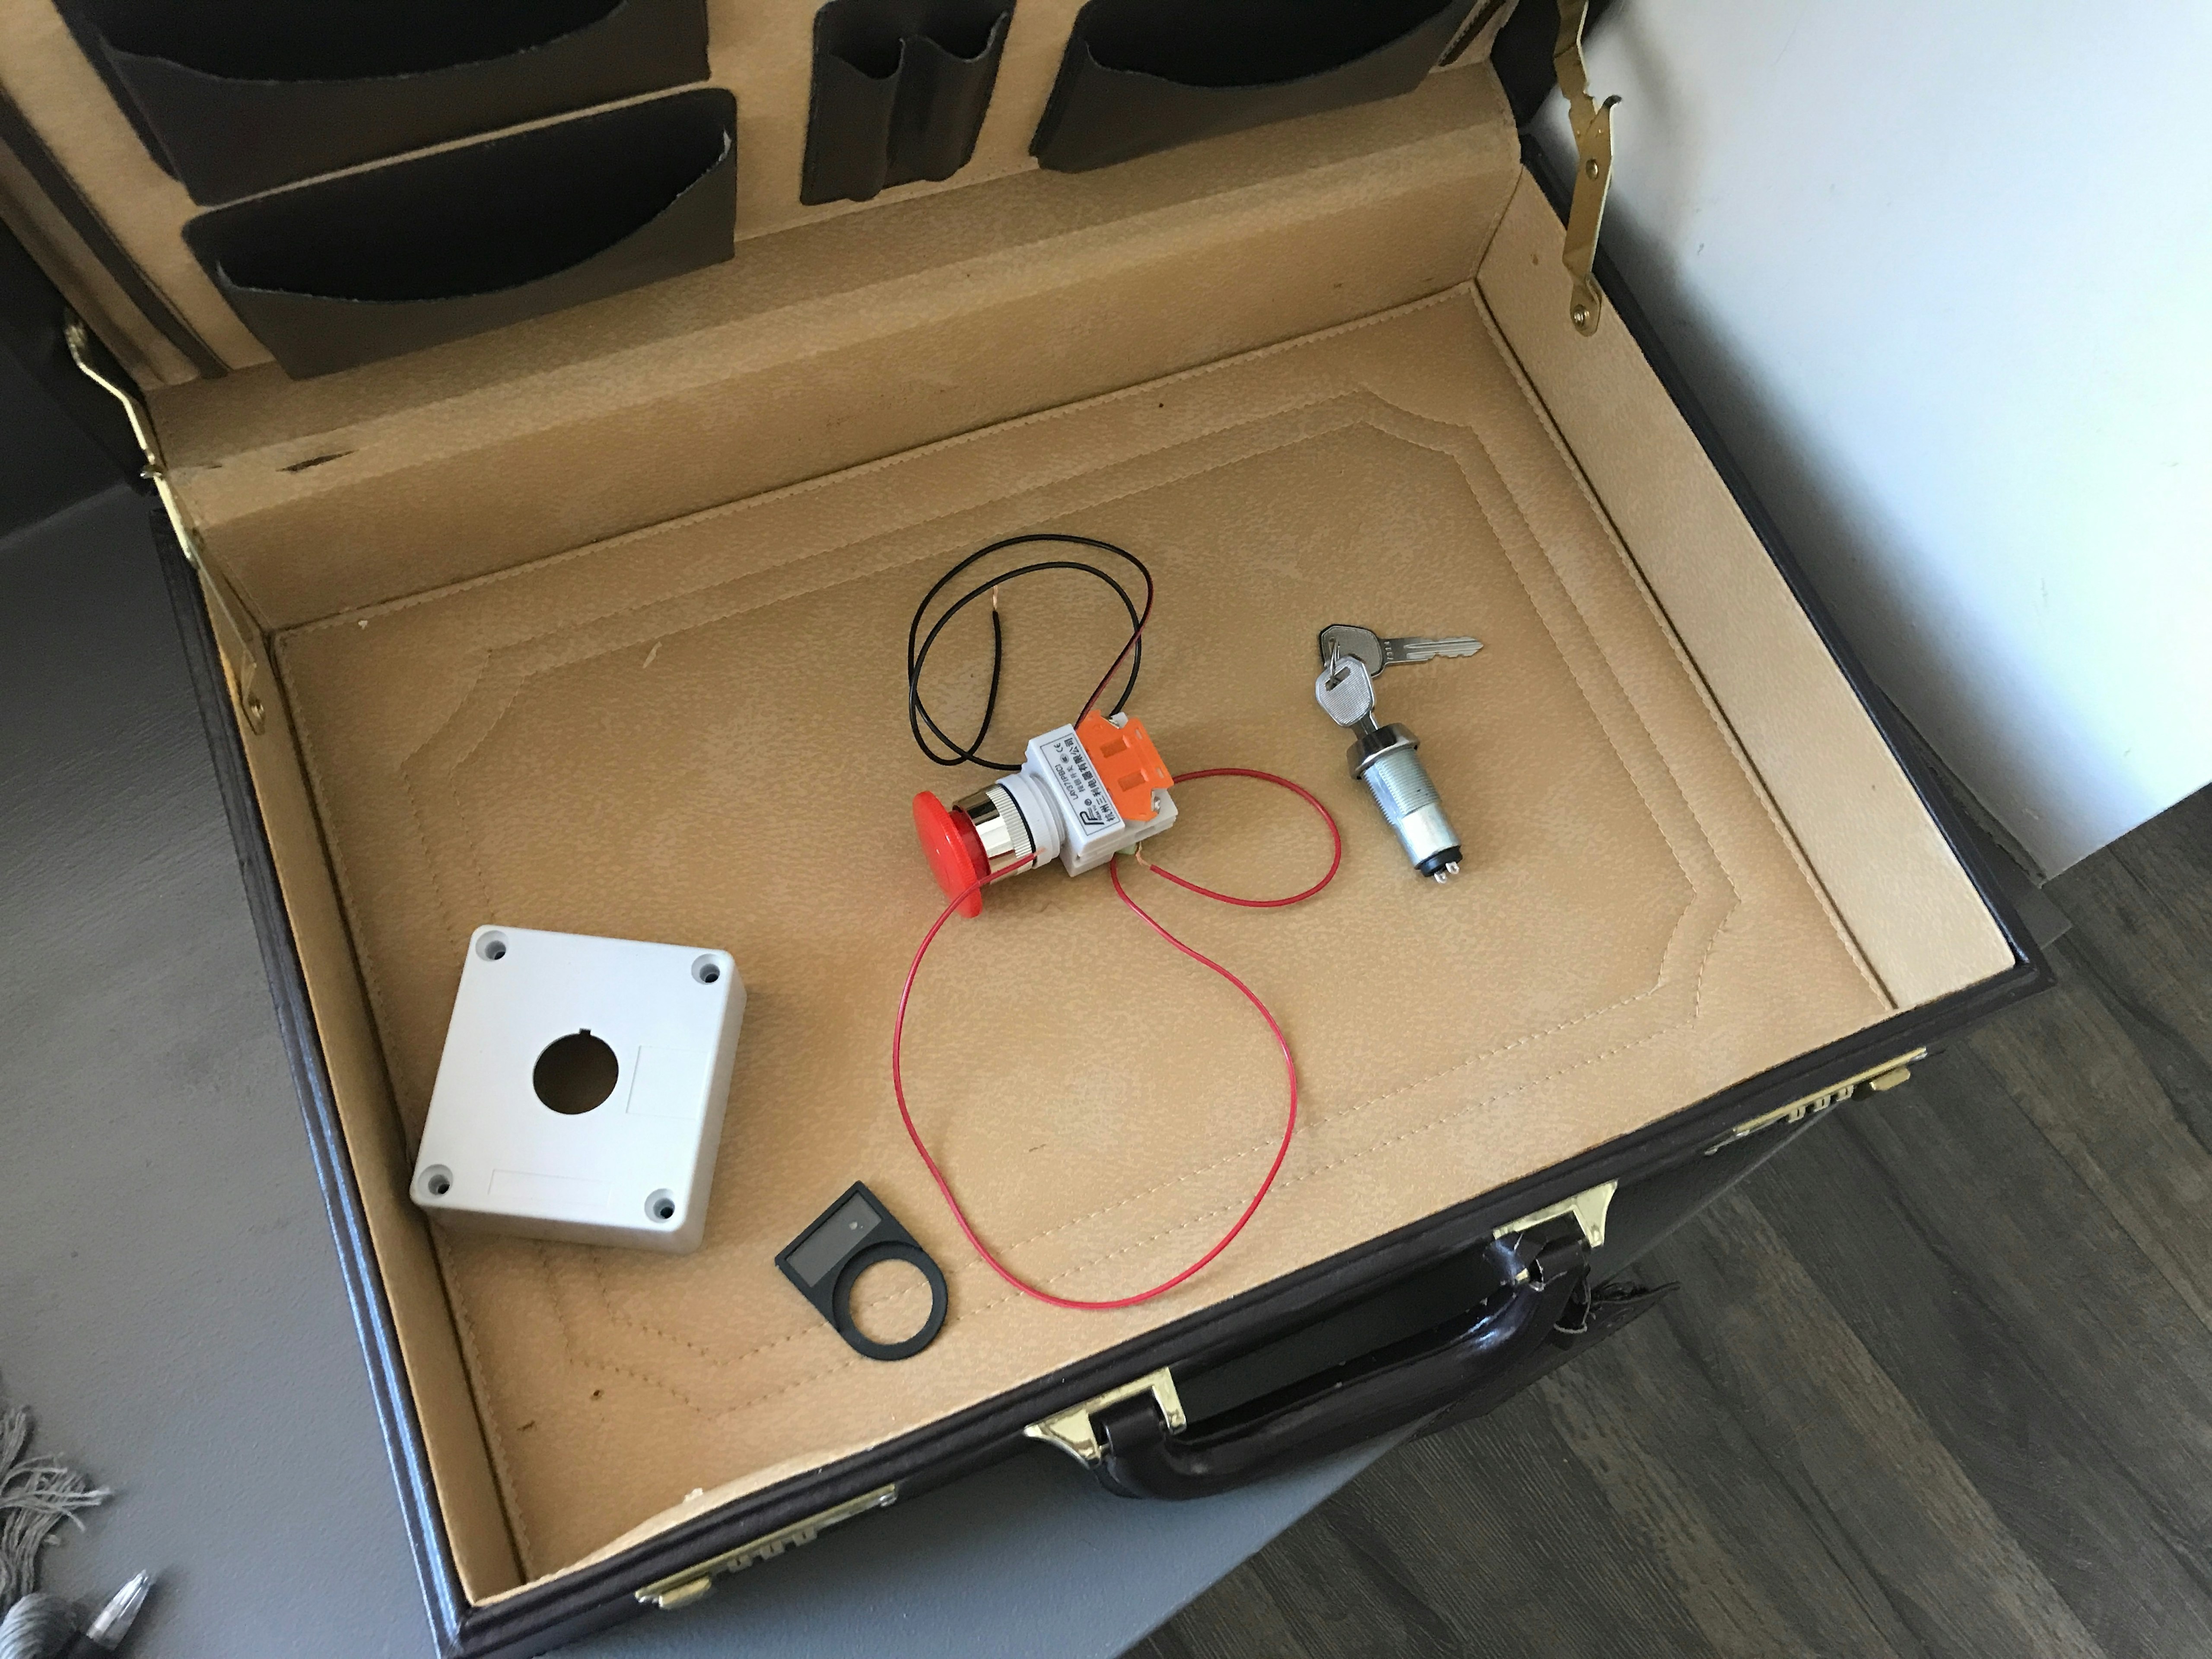
A question here was whether or not all of the components would fit within the briefcase. The Big Red Button turned out to be pretty big, and with its casing it would have been too tall to allow the briefcase to close. After disassembling it and discaring the casing, it now had enough clearance to allow the briefcase to close.
Another open question was whether all of the components could be mounted flush with a surface and still allow the briefcase to close. After some quick eyeballing and some rough measurements, that question was quickly answered: yep.
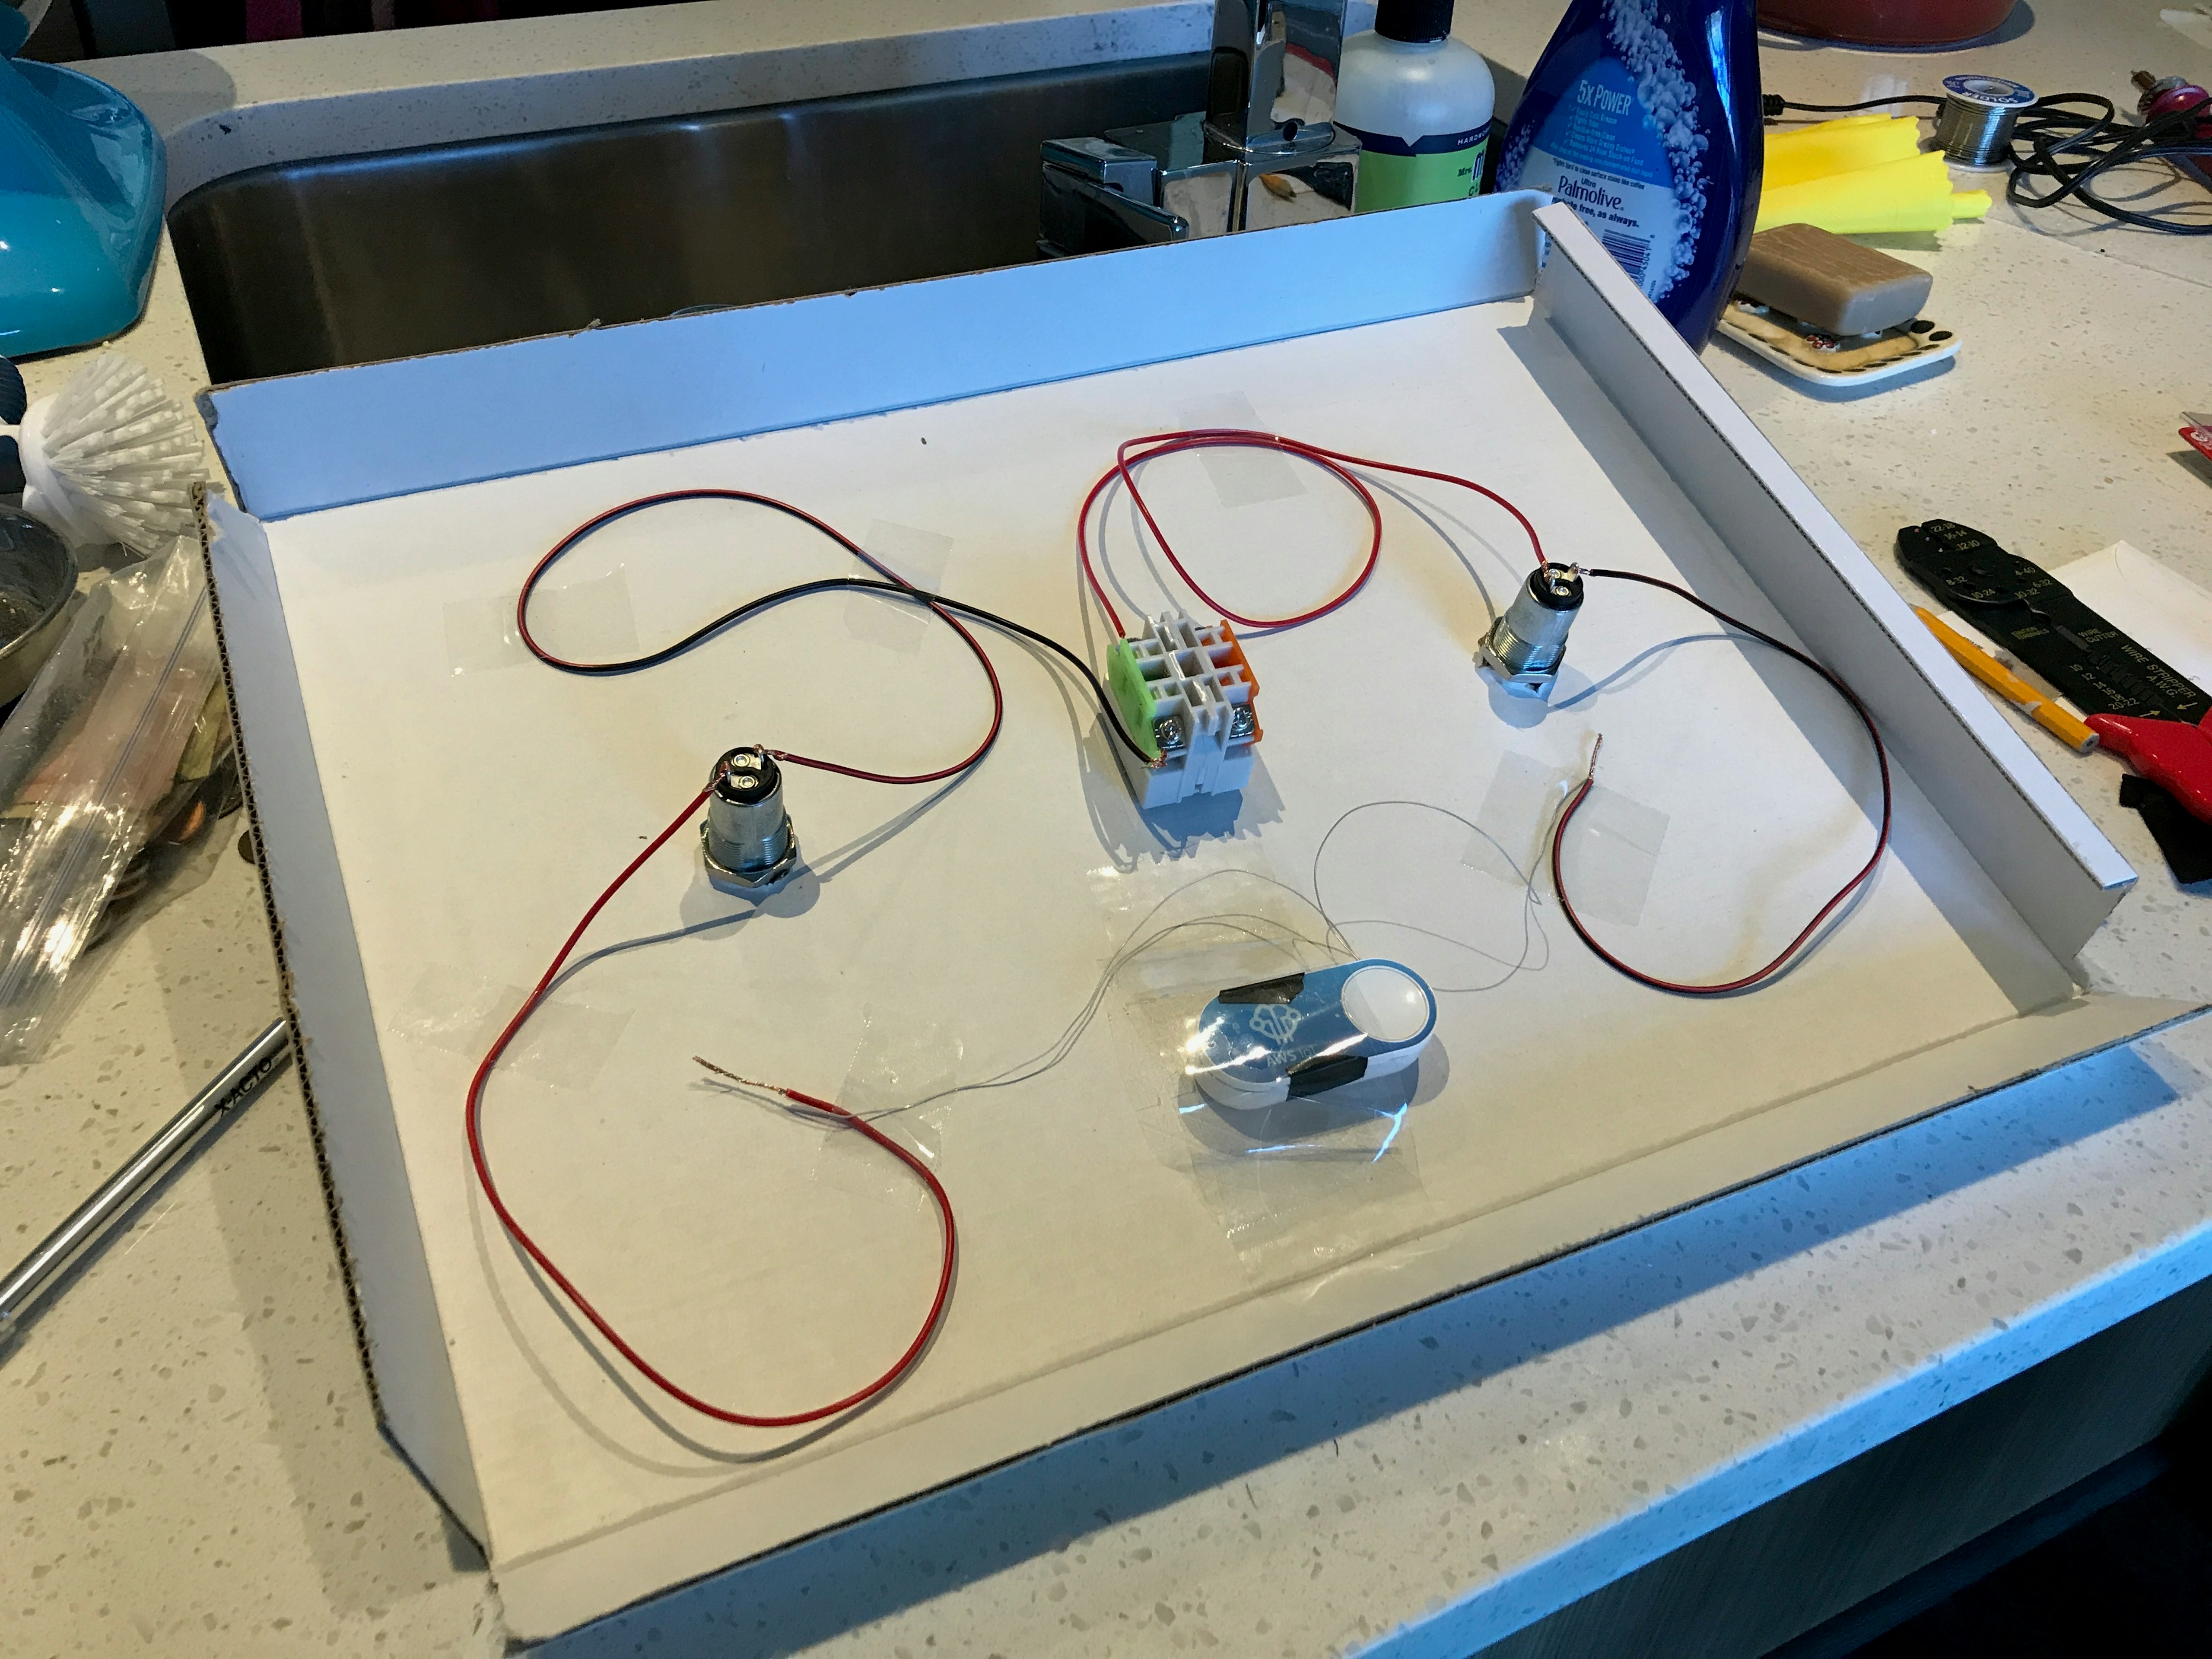
Next up was actually mounting these components to a surface. I used a thin piece of cardboard for the Mark I, but future versions could have wood or a magnesium alloy if we want to get really wild.
The layout was straightforward, and some simple measurements and cuts with an X-ACTO knife and we were done.

Once the components were mounted, it was time to wire them together. I no longer had access to a soldering iron at this point, so the wires were just twisted together where needed. This wiring won’t win any awards, but it gets the job done.

With that, the hardware part was done. Now onto the software.
Architecture
Let’s recap: Pressing an AWS IoT Button triggers an AWS Lambda function, which can be any arbitrary bit of code.
I find managing these Lambda functions to be a bit of a pain, so my goal here was to get the request out of Lambda as quickly as possible and into something more ergonomic.
My stack of choice is Rails on Heroku, which is just fine for this use case albeit heavy.
At Gusto, we use a Hubot in a Slack channel to kick off deploys of different applications. Having a chat-based deploy forces teams to make deploys frictionless. When deploys are frictionless, they happen more often. When they happen more often, they become safer. When they are safer, customers and developers are happier.
So to recap:
- The AWS IoT Button triggers an…
- AWS Lambda Function which forwards the request to a…
- Rails app running on Heroku which…
- Transmits a request to a Slack incoming webhook which…
- Triggers a deploy via Hubot.
Is this much more complicated than it needs to be? Definitely. Would Rube Goldberg be proud? You betcha.
I won’t dive too much into the software here because it will differ wildly depending on your own stack and deploy process.
The thing you will want to configure for your own purposes will be the Lambda function itself. Here is the function that I use:
Once the software was wired up, Mark I was complete!
Conclusion
It’s always nice to take a “What if…” question and turn it into reality. Nobody needs a Deploy Football. It’s silly, expensive, and much slower than just deploying via Hubot normally.
But that’s the point. It takes something that is (thankfully) a dull affair and turns it into something with fanfare only when you need it. At Gusto, we use it for big launches.1 The briefcase is always free to use by anyone on the team.2
I realize there might be a market for this type of thing. If you’re interested in a Deploy Briefcase but don’t have the time to build it yourself, drop me an email. I might put this on Kickstarter if there’s enough interest.
Special thanks to my father, Chris Sutton, for helping me out with the project.
Special thanks to Danny Grant, Iheanyi Ekechukwu, Justin Duke, Sihui Huang, Ryan LeFevre, and Amelie Meyer-Robinson for providing feedback on early drafts of this post.
-
The “big launch” at Gusto is a bit of a misnomer. Launching something is just a matter of flipping feature flags in a web-based admin panel. Most features are dark in production for weeks during internal and beta testing. ↩
-
Compliance is a pretty big part of what we do, so we need to track who triggers which deploys. We do have mechanisms to figure out who is using the briefcase to deploy code. It’s a good challenge to have fun and remain compliant. ↩